


当サイトは
リンクフリーです
|
オールセラミッククラウン治療手順6
|
ALL CERAMIC CROWN
|
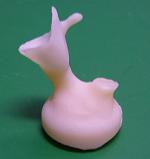
ワックスアップ
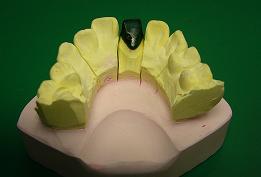
専用のワックス(蝋)をバーナーで軟らかくし、作業模型上のクラウンを作る歯(支台歯)の表面にワックスが固まらないうちに素早く盛り付けます。ワックスが固ってから各種の彫刻刀を用いてクラウンの内層部分(コア)の原型を削り出します(ワックスアップ)。最後にセラミックに置き換えるための注ぎ口(スプルー)を取り付けます。
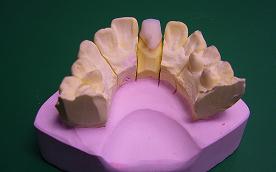
セラミックコアの作製
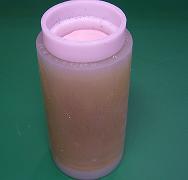
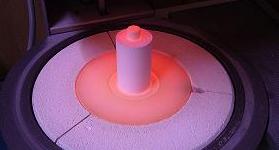
次に、ワックスコアを円筒形のステンレスリングの中に入れ、耐熱性の専用の石膏(埋没材)を流し込んで埋め込みます(埋没)。埋没材が固まった後、800℃の炉(リングファーネス)に入れ、温度を少しずつ上げていきます。リングの中のワックスが徐々に溶けて、その部分だけが空洞になります。その空間に軟化したセラミックを圧迫して流し込みます。
冷却後に出来上がったセラミックコアを掘り出し、スプルーを切り取ります。最後にセラミックコアが模型に適合するか確認します。
 |
|
 |
|
1コアの原型をワックスで作成する唇側(表側)
|
|
口蓋側(裏側)
|
|
|
|
 |
|
 |
|
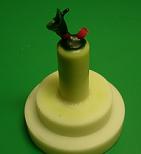
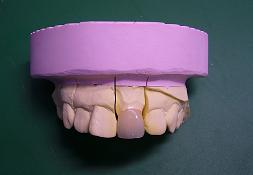
2ワックスコアにスプルーを取り付けて埋没台の上に固定する
|
|
3ワックスコアの周囲に専用の埋没材を流し込む
|
 |
|
 |
|
4電気炉に入れて加熱しワックスを蒸発させる。生じた空間にセラミックを軟化して圧迫し流し込む
|
|
5完全に冷えたら埋没材から掘り出す
|
 |
|
 |
|
6スプルーを切り落とし、完成したセラミックコア唇側(表側)
|
|
口蓋側(裏側)
|
|

 ひぐち歯科クリニック